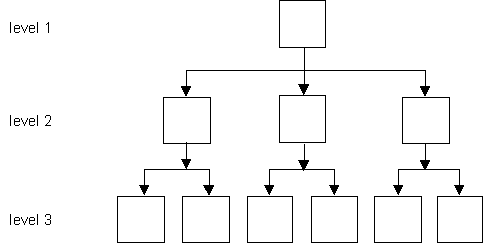
In my many years as a software engineer I have often come across the requirement for a structure that will hold some sort of hierarchy, as represented in figure 1:
Figure 1 - A typical hierarchical structure

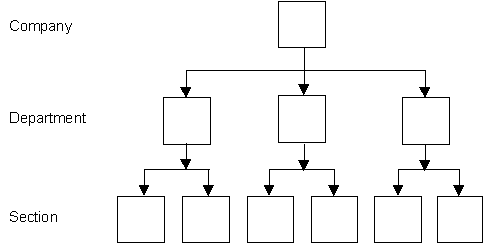
A typical example of a structure like this is an organisational hierarchy, as shown in figure 2:
Figure 2 - An Organisational hierarchy
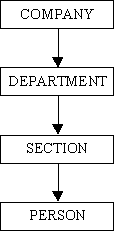
A structure like this is typically implemented in an Entity-Relationship (E-R) diagram as shown in figure 3:
Figure 3 - A typical E-R diagram
This is perfectly legitimate, but it results in a rigid rather than a flexible structure. How easy would it be to modify this structure for any of the following?:
This type of structure, with its hierarchical nature, is also known as a TREE structure. A common example of this is the view provided by Windows Explorer which shows the hierarchy of folders and the files contained within those folders (although the structure is displayed from left-to-right rather than from top-to-bottom). A similar view is available in Uniface forms by using the TREE widget.
A tree contains objects known as NODES and LEAVES. These obey the following rules:
In Windows Explorer the NODES are equivalent to FOLDERS (previously known as DIRECTORIES) with the ROOT NODE representing a drive such as C: or D:, and the LEAVES are equivalent to FILES.
In figure 3 COMPANY, DEPARTMENT and SECTION are the nodes, with PERSON providing the leaves.
In designing my flexible structure I concentrated solely on the nodes. A leaf can be any other object within the database (eg: a person, a place, or a part), and linking a leaf to a node is as simple as storing the primary key of the node within the details of the leaf. There is no need to include the Tree Type or the Tree Level as these are obtained from the node details.
I wanted a table for NODES, and I needed to be able to relate a node to its parent node.
I needed to organise nodes into various LEVELS, each which its own customisable description.
I needed to have different sets of levels so that I could have more than one TYPE of structure.
This enabled me to produce the database design shown in figure 4:
Figure 4 - My database design
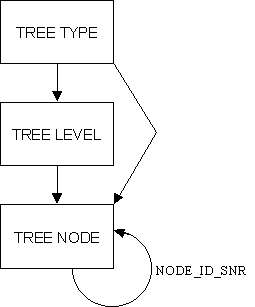
Where TREE_NODE is related to itself this is handled by creating a subtype with a one-to-many relationship as shown in figure 5:
Figure 5 - Subtype for node-to-parent relationship
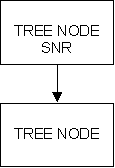
These database tables have the following contents:
| TREE TYPE | ||
| TREE_TYPE_ID | C8 | Primary Key |
| TREE_TYPE_DESC | C40 | Description |
| TREE LEVEL | ||
| TREE_TYPE_ID | C8 | Primary key, foreign key to TREE_TYPE |
| TREE_LEVEL_ID | N2 | Primary key |
| TREE_LEVEL_SEQ | N2 | Sort Sequence |
| TREE_LEVEL_DESC | C40 | Description |
| TREE NODE | ||
| NODE_ID | N4 | Primary key (technical key) |
| TREE_TYPE_ID | C8 | Foreign key to TREE_TYPE |
| TREE_LEVEL_ID | N2 | Foreign key to TREE_LEVEL |
| NODE_DESC | C40 | Description |
| NODE_ID_SNR | N4 | ID of parent node (foreign key to TREE_NODE_SNR) |
Each TREE_TYPE is subject to the following rules:
Each TREE_LEVEL is subject to the following rules:
Each TREE_NODE is subject to the following rules:
The following screen shots are part of the example application which is available for download on my Building Blocks page.
First go into the List Tree Type screen - on a new database this will be empty.
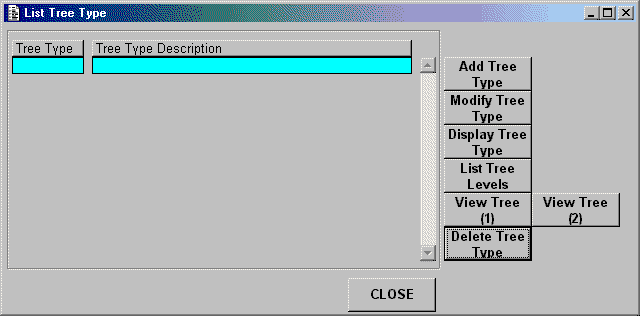
From here select the navigation button to go into the Add Tree Type screen.
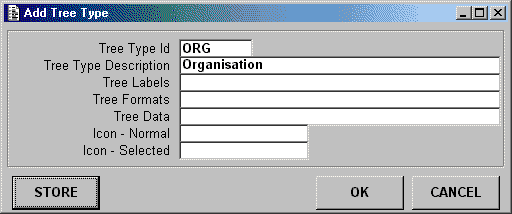
In this example we are creating an entry with an ID of 'ORG' and description of 'Organisation'. Ignore the remaining fields as they are used to customise the list view of the tree widget. Press the OK button to update the database and return to the List Tree Type screen.
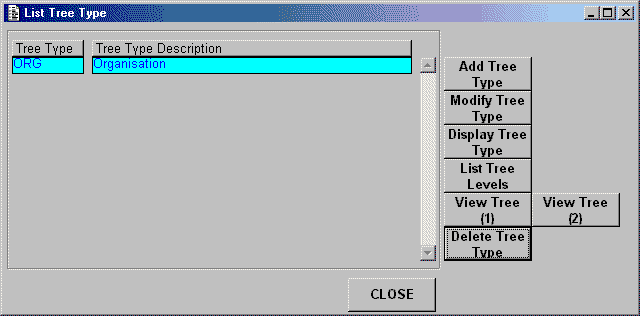
This will now show the entry which has just been added.
From within the List Tree Type screen press the navigation button to go into the List Tree Levels screen.
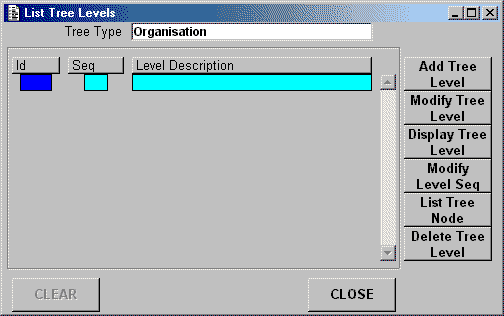
This will initially be empty, but will show the Tree Type selected in the previous screen, which in this case is 'Organisation'. From here press the navigation button to go into the Add Tree Level screen.
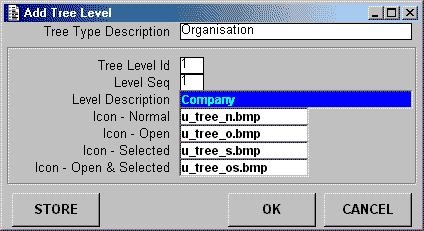
Again this will show the Tree Type we are dealing with, and will set both Tree Level ID and Level Sequence to their next available values for this Tree Type, which in this case will be 1. Enter a description for level 1, which in this example is 'Company'. Ignore the Icon fields as they are used to customise the display in the tree widget. Press the STORE button to update the database without leaving this screen. The description field will clear and the ID and SEQ numbers will automatically be incremented to their next available numbers.
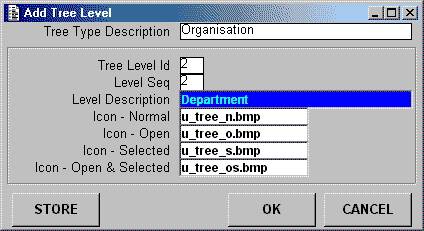
Enter the description for level 2, which is this example is 'Department'. Press the STORE button to update the database without leaving this screen.
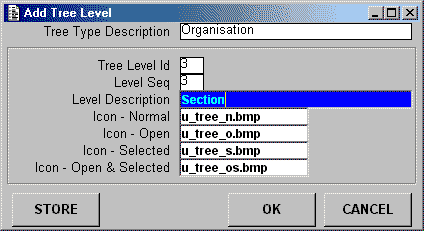
Enter the description for level 3, which is this example is 'Section'. Press the OK button to update the database and return to the List Tree Levels screen.
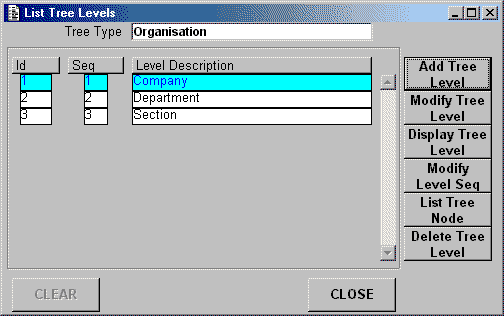
This will now show all the Levels which have been defined for this Tree Type.
From the List Tree Levels screen highlight the level to which you want to add nodes by clicking on it, then press the navigation button to go into the List Tree Nodes screen.
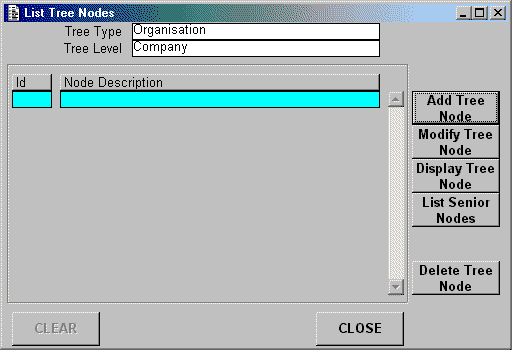
This will show the current Type as 'Organisation' and Level as 'Company'. From here press the navigation button to go into the Add Tree Node screen.
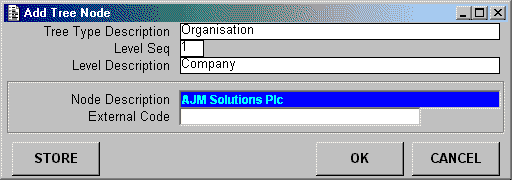
Again the current Type and Level are displayed. Enter the description for the node, in this example it will be 'AJM Solutions Plc'. The node ID is not shown as it is an automatically generated technical key. Press the OK button to update the database and return to the List Tree Nodes screen.
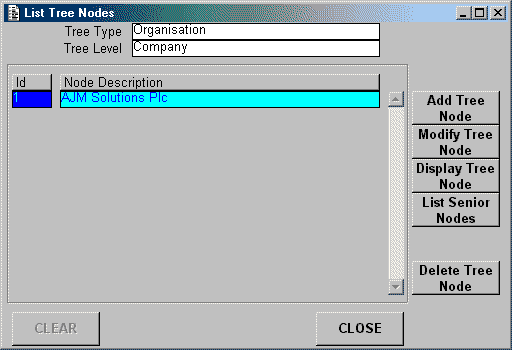
This will show the details of the entry which you have just added. Press the CLOSE button to return to the List Tree Level screen.
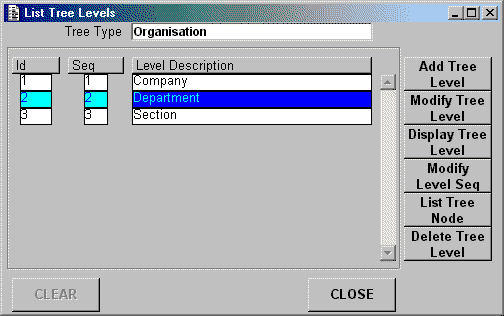
Highlight the 'Department' level by clicking on it, then press the navigation button to go into the List Tree Node screen.
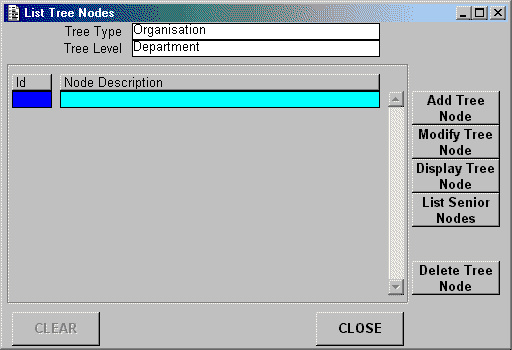
This will show the current Type as 'Organisation' and Level as 'Department'. From here press the navigation button to go into the Add Tree Node screen.
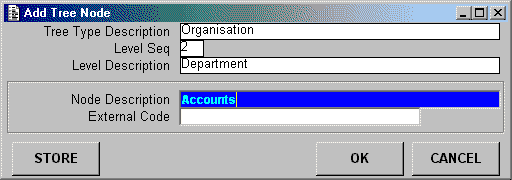
Create an entry for 'Accounts' and press the STORE button. The entry will be added to the database and the screen will clear ready for new input.
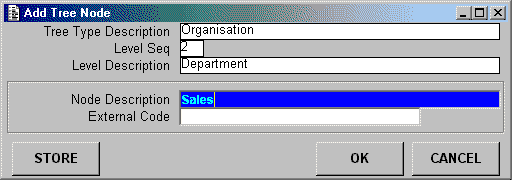
Create an entry for 'Sales' and press the STORE button.
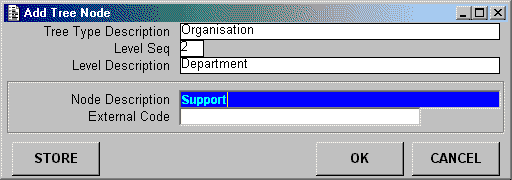
Create an entry for 'Support' and press the STORE button.
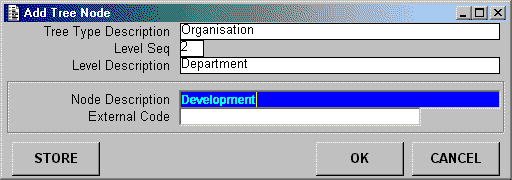
Create an entry for 'Development' and press the OK button. This will update the database and return you to the List Tree Nodes screen.
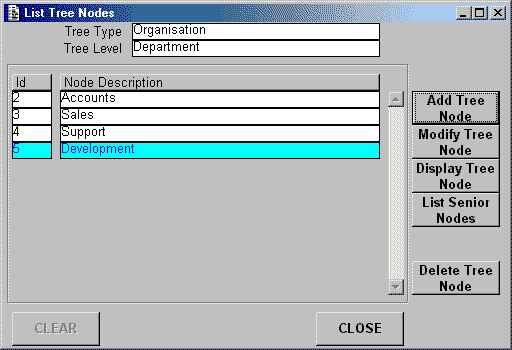
This will now show all the nodes that exist for the 'Department' level in the 'Organisation' structure. Press the CLOSE button to return to the List Tree Levels screen, select the occurrence for the 'Section' level, press the List Tree Nodes button followed by the Add Tree Nodes button to create various nodes at the 'Section' level in the 'Organisation' hierarchy. Then return to the List Tree Nodes screen to view the result.
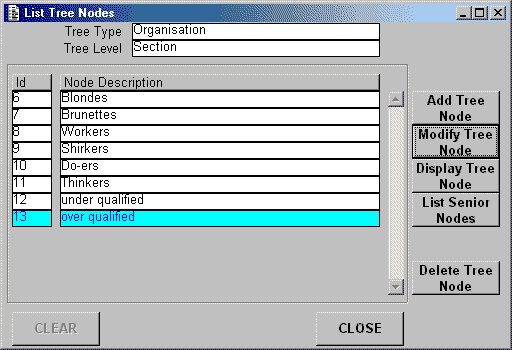
The node descriptions here are purely for illustrative purposes. In the real world you would probably use something completely different.
None of the nodes created so far has been linked to a parent, so they are all considered to be orphan nodes. This does not matter for any node at level 1 as root nodes do not have parents, but all nodes at other levels must have their parentage defined before they will show up in the tree structure. To do this return to the List Tree Type screen and press the navigation button for View Tree (1).
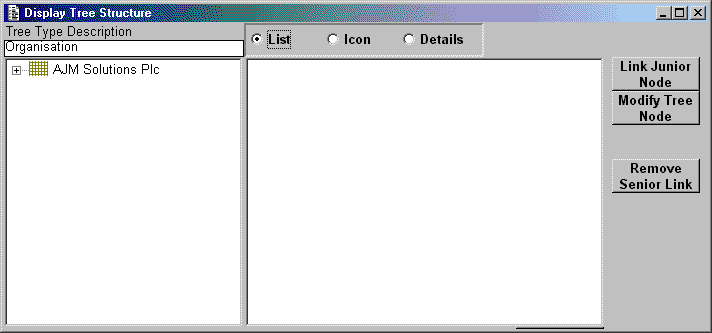
This will show the current structure of the selected Tree Type. This version has navigation buttons which will allow the structure to be amended. This will start by only showing the root nodes (those at level 1) for the selected Tree Type, which is shown here as 'Organisation'. If you press the '+' button to expand the tree to the next level down nothing will happen yet as this root node does not have any children. To create a relationships, and thereby a usable structure, it will be necessary to first select the parent node, then press the navigation button to bring up the Link Junior Node screen.
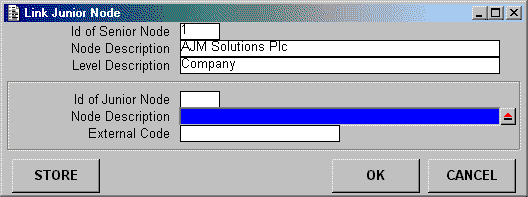
This will show the description and level for the selected parent node. The only way to select a child node is to go via the Choose Orphan Node screen which is automatically activated upon initial entry.
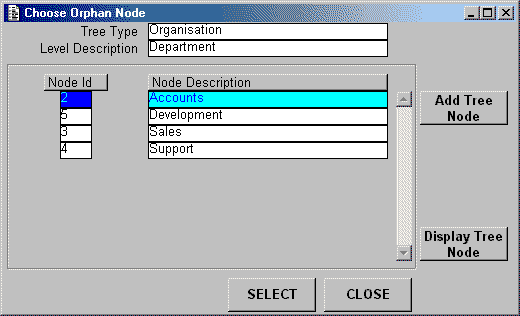
This will show those orphan nodes (nodes without parents) which exist for the selected Tree Type and Tree Level. Only these nodes can be linked as children to the current parent.
If the node you require has not been defined yet it will be possible to use the navigation button labeled Add Tree Node to create it without having to return to the List Tree Nodes screen. Highlight a node and press the SELECT button to return to the Link Junior Node screen.
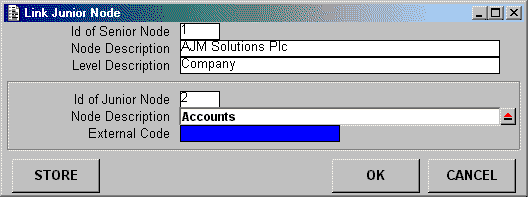
This will now show the selected orphan node. Press the STORE button to update the database with the relationship. The screen will then clear, so it will be necessary to press the ![]() button to reactivate the Choose Orphan Node screen. Select all the remaining nodes at this level, then return to the Display Tree Structure screen.
button to reactivate the Choose Orphan Node screen. Select all the remaining nodes at this level, then return to the Display Tree Structure screen.
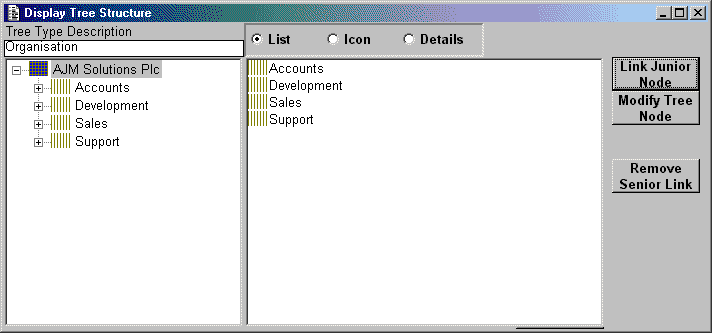
This will now show all the child nodes that have just been related (linked) with the selected parent node. From this screen you can now select each of these nodes at level 2 and relate the relevant orphan nodes which exist at level 3.
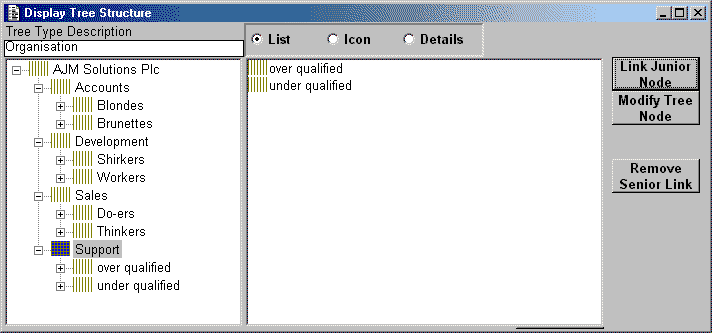
You will note here that the nodes at level 3 have been split across the nodes at level 2.
Sometimes it may be necessary to trace a node's ancestry all the way to the top of the tree. From the List Tree Type screen press the navigation button to go into the List Tree levels screen. Select a level (in this example level 3 'Section') then press the navigation button to bring up the List Tree Node screen. From here select any desired node then press the navigation button for the List Senior Nodes screen.
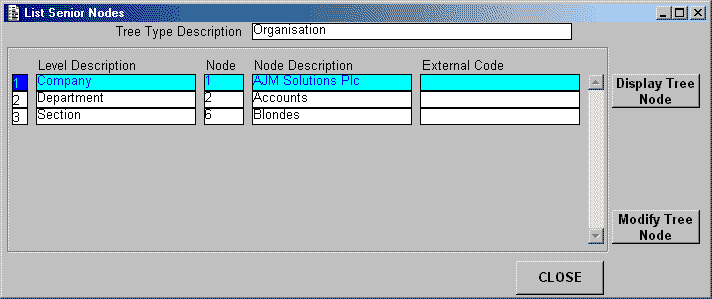
This will show the selected node on the bottom line ('Blondes' in this example) with its associated level number and description. Immediately above that will be the details for its parent, and its parent and so on until a root node is reached. If a root node at level 1 is not shown it means that a link to a parent node has yet to be defined.
The previous example showed how to create a tree structure called 'Organisation' with its own set of levels and nodes. Using the same software I can create any number of other structure (tree) types. To do this start at the List Tree Types screen:

This shows the existing entries for Tree Type. Press the navigation button to go into the Add Tree Type screen.
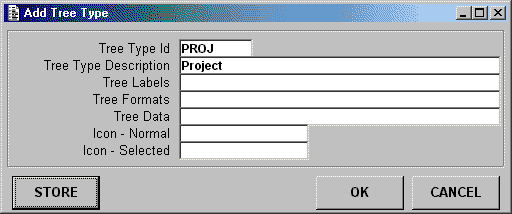
In this example we are creating an entry with an ID of 'PROJ' and description of 'Project'. Ignore the remaining fields as they are used to customise the list view of the tree widget. Press the OK button to update the database and return to the List Tree Type screen.
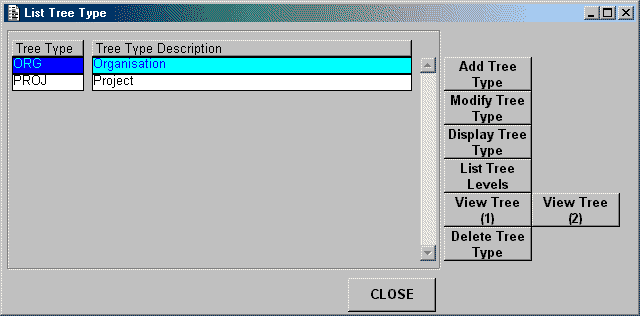
This now shows the entry that has just been created. Click on this entry to highlight it and then press the navigation button to go into the List Tree Levels screen.
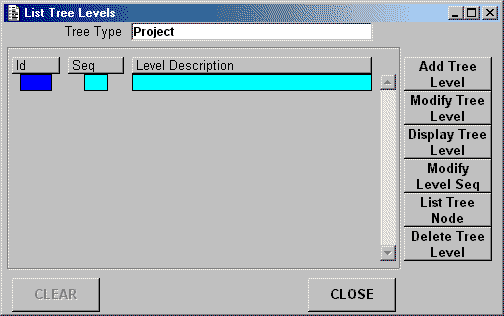
This will initially be empty, but will show the Tree Type selected in the previous screen, which in this case is 'Project'. From here press the navigation button to go into the Add Tree Level screen.
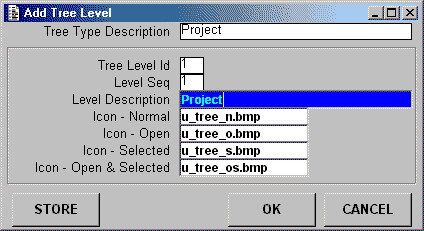
Again this will show the Tree Type we are dealing with, and will set both Tree Level ID and Level Sequence to their next available values for this Tree Type, which in this case will be 1. Enter a description for level 1, which in this example is 'Project'. Ignore the Icon fields as they are used to customise the list view of the tree widget. Press the STORE button to update the database without leaving this screen. The description field will clear and the ID and SEQ numbers will automatically be incremented to their next available numbers.
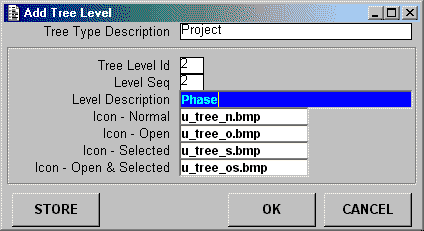
Enter the description for level 2, which is this example is 'Phase'. Press the STORE button to update the database without leaving this screen.
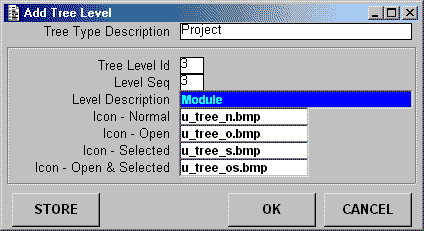
Enter the description for level 3, which is this example is 'Module'. Press the OK button to update the database and return to the List Tree Levels screen.
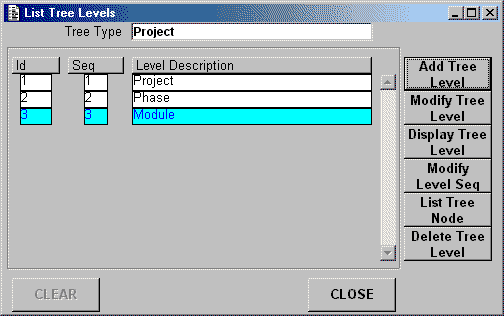
This will now show all the Levels which have been defined for this Tree Type. All you need do now is to create the required nodes for each of these new levels, then relate each node to its parent After this you could end up with a structure something like this:
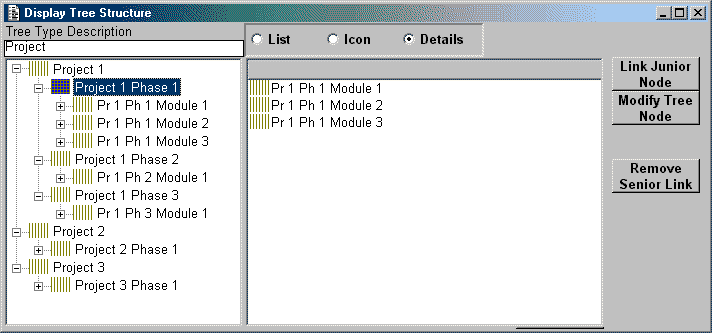
From this you can see that this design can support any number of structure (tree) types, each with its own set of levels and nodes. However, the flexibility of this design does not end there - you can also add new levels into existing structures, and remove redundant levels.
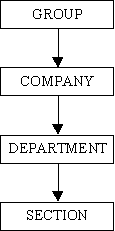
The power of this design lies in its ability to amend the number of levels in an existing structure without having to erase and rebuild it. In the following example the original company at level 1 merged with two other companies, with the requirement that a new level called 'Group' be added at the top to create a 4-level structure as shown in figure 6:
Figure 6 - The new 4-level structure
Here is how the existing structure can be modified. Go into the List Tree Type screen, highlight 'Organisation' by clicking on it and press the navigation button for the List Tree Levels screen.

This will show the existing 3 levels. Press the navigation button to go into the Add Tree level screen.
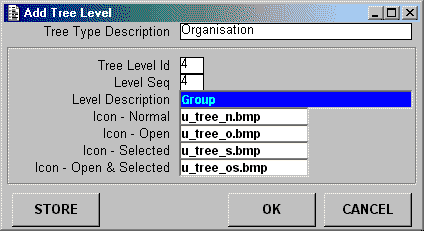
This will automatically fill in the next available values for Level ID and Level Sequence. All you have to do is fill in the description, which in this example is 'Group'. Press the OK button to update the database and return to the List Tree Levels screen.
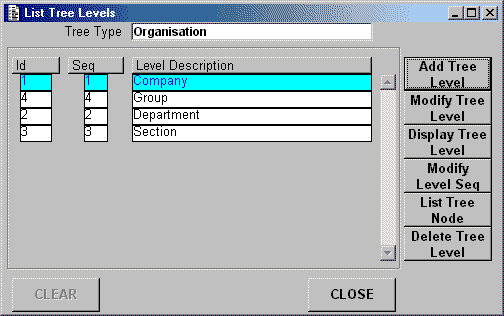
This shows the new entry at level 4 when we actually want it at level 1. To do this press the navigation button to go into the Modify Level Sequence screen.
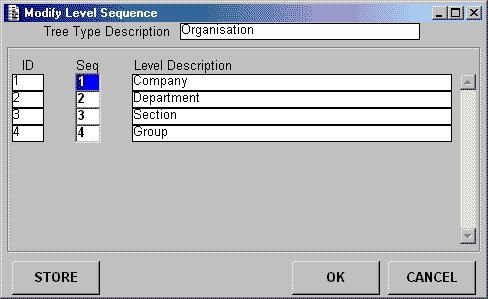
This shows the existing ID's which cannot be changed (as they are primary keys), but we are able to change the sequence in which they are to be placed in the structure.
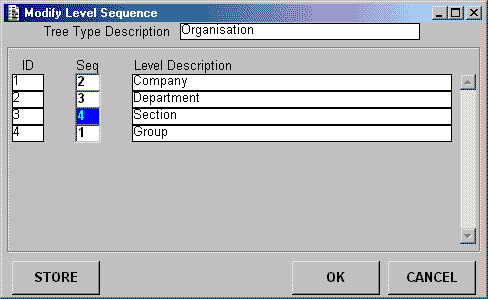
What we have done here is to put 'Group' at sequence 1 and move all the others down by 1. Note that the sequence numbers must start at 1 and continue in an unbroken sequence. Press the OK button to update the database and return to the List Tree Levels screen.
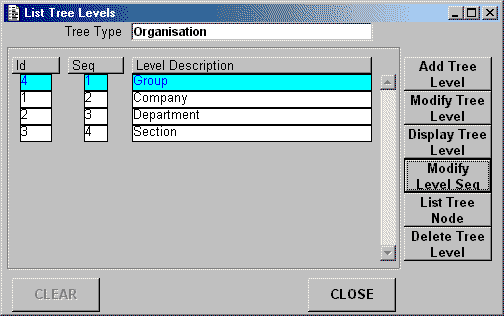
As you can see these levels have now been resequenced without changing the primary keys. As all nodes are tied to a Level by its primary key (Level ID) this means that all nodes will automatically stay with that level description regardless of any changes to its sequence number. All we need to do now is to create the required node(s) for the new level, then perform any linking to the lower level. Leave 'Group' highlighted and press the navigation button to go into the List Tree Nodes screen.
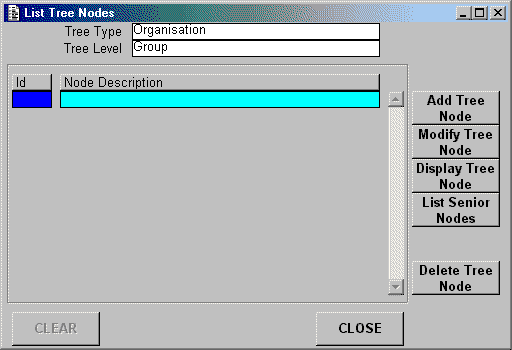
This will show the current Type as 'Organisation' and Level as 'Group'. From here press the navigation button to go into the Add Tree Node screen.
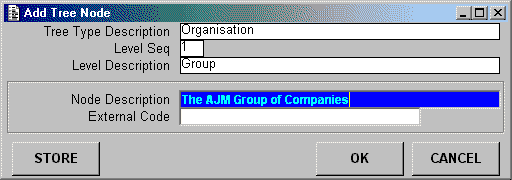
Again the current Type and Level are displayed. Enter the description for the node, in this example it will be 'The AJM Group of Companies'. The node ID is not shown as it is an automatically generated technical key. Press the OK button to update the database and return to the List Tree Nodes screen.
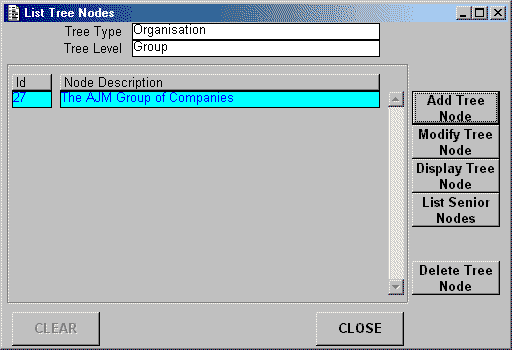
This will show the details of the entry which you have just added. Press the CLOSE button to return to the List Tree Level screen.

We must now add the new companies that are in the group. Highlight 'Company' by clicking on it, then press the navigation button for the List Tree Nodes screen.

Press the navigation button for the Add Tree Node screen and create entries such as 'AJM Problems Plc' and 'AJM Excuses Plc'. Return to the List Tree Nodes screen to view the results.
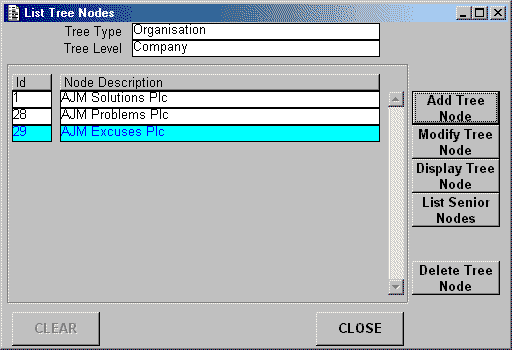
You must now return to the List Tree Type screen and go into the View Tree (1) screen in order to link the new node at level 1 (Group) with the nodes at level 2 (Company) so that they will be visible in the structure. Afterwards you should see something like this:
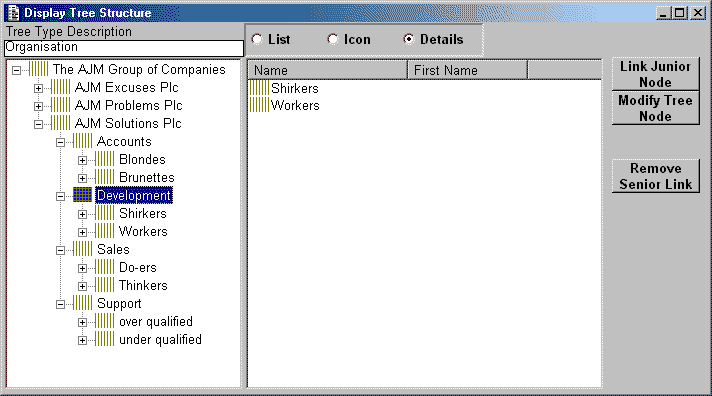
Note that all the existing nodes which were linked to 'AJM Solutions Plc' are still there. They have remained attached to that node although the levels have changed. The same applies to any leaves - they stay attached to the same node regardless of its position within the structure.
This activity is also possible with this design although the steps are a little more involved. This is what you do:
All these steps are required if you remove a level from the middle of the structure. If you remove just the top or bottom level then some of these steps will not be necessary.
Although this design requires no more than three database tables you can see that it can cater for any number of structure types with any number of levels and any number of nodes. The ability to expand or contract existing structures without changing the database and without changing any software is another powerful benefit that is simply not possible with traditional, less flexible designs.
The software used to create the screen shots in this article is available for download from my Building Blocks page.
Associated articles:
Using Nodes in a Tree Structure to provide Record-Level Security.
Using Nodes in a Tree Structure to generate Nominal Codes.
Tony Marston
31st October, 2001
mailto:tony@tonymarston.net
mailto:TonyMarston@hotmail.com
http://www.tonymarston.net